http://urbanposer.blogspot.de/2012/04/best-almond-flour-cinnamon-rolls-paleo.html?m=1
The Best Almond Flour Cinnamon Roll Biscuits
(Grain & Dairy Free)
Ingredients:
For the biscuit rolls
3 cups'Honeyville' blanched almond flour 1/2 tsp salt (or just slightly under that amount)
1/4 tsp baking soda
1/4 cup coconut oil/palm shortening, softened or liquid
2 Tbls honey
2 large room temp eggs (about 3.34 ounces/94 grams)
For the filling
1/4-1/2 cup honey (depending on how much sweetness you like)
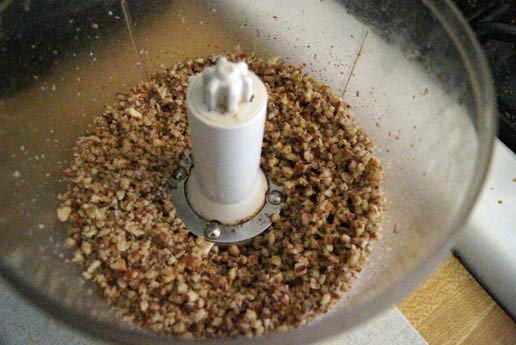
1/2 cup ground pecans/walnuts
1/2 cup raisins
1- 2 Tbls ground cinnamon
Icing recipe and instructions is at the end of the post
Directions:
Directions:
Preheat the oven to 340 degrees
For best results use a high quality grind of almond flour like Honeyville
In a large bowl, combine the almond flour, salt and baking soda. Be sure to use the "Dip & sweep" method for the AF. Dip the measuring cup into the AF (it should be loose, not packed) and drag a knife or other flat edge over the top. Other forms of measuring (pouring or spooning) may result in either too much or too little flour.
In a separate bowl, gently beat together the coconut oil/palm shortening honey and room temp eggs. If the eggs are too cold, they might cause the coconut oil to harden.
Add the egg mixture to the almond flour mixture. Mix(knead) until a decently smooth dough is formed. It may seem sticky at first. Continue mixing till it firms up some. You can also let it rest in the fridge for 10 min. This will make it easier to work with.
Lightly grease the outside of the ball of dough. Roll the dough out between two sheets of parchment paper, into a 9x13 rectangle (approx.). Use a little almond flour on the bottom piece of parchment paper to keep it from sticking when you roll it up later. Take your time and get a good uniform rectangle.
Drizzle the 1/4-1/2 cup of honey evenly over the dough, then carefully spread it around to cover the whole surface. Honestly, I use my fingers to do this. I find that I am less likely to tear the dough this way.
Sprinkle the raisins, grounds pecans and cinnamon (or whatever you like) over the surface of the honeyed dough. Try to keep the filling additions finely chopped so they do not tear through the sough when you start rolling.
Now your ready to roll it up! Turn the dough so that the short end is facing you. Starting at that end, begin to roll the edge of the dough away from you. Try to start a tight roll from the beginning. Continue rolling until you have a nice uniform log. Again, take your time and get a uniform, tight roll. If the roll cracks use the warmth of your hand to press it together and make it smooth again. Use the parchment paper to help you roll as needed. Be gentle and careful when rolling up the dough. This dough is not as workable as a gluten based flour would be.
With a good bread knife, cut the roll into about thick slices, I just use the width of two to three fingers (depending on how thick the roll is) as my guide. Shape them a bit if needed.
Lay the rolls cut side down on to a parchment line cookie sheet. They can be placed apart or connected.
Bake 10-15 min.
I suggest staying close to the stove and checking a few before the baking time is up. Everyone's oven cooks a bit differently and baking times will vary depending on the size of the rolls They should be golden with some browning. The dough toward the center of the roll should be soft but not to doughy. If baked too long they WILL become dry and hard. If cooked just right though, they will be heavenly.
When ready, remove from the oven and let cool for about 10 min. If you try to move them before then, they are ikely to fall apart.
Drizzle with coconut butter and/or honey just before serving.
Makes about 9-10 cinnamon rolls.
For the icing
Option 1:Just drizzle a little warmed coconut butter or honey over the rolls
Option 2:
When we want something a bit sweeter, we like this glaze:
1/4 cup softened coconut butter (should be pourable add more liquid as needed)
2-3 teaspoons honey,
1/4 teaspoon vanilla extract
1/4 cup full fat coconut milk
Mix together the coconut butter and honey to form a thick paste.
Now add the vanilla, than coconut milk one tablespoon at a time till it is a consistency you like.
(Note: It is important to warm and stir coconut butter when opening a new jar. The coconut oil on the top needs to be mixed into the 'butter' in order to get a nice consistency)
What to expect? These cinnamon rolls, if baked right are soft and lovely. Since it is not a yeast or gluten based dough they will not have that 'stretchy, pull apart' feel that a yeast/gluten based roll would have. I would consider them to more of a 'biscuit' style cinnamon roll and less sweet then the traditional cinnamon roll.
- See more at: http://urbanposer.blogspot.de/2012/04/best-almond-flour-cinnamon-rolls-paleo.html?m=1#sthash.oE4tBULg.dpuf

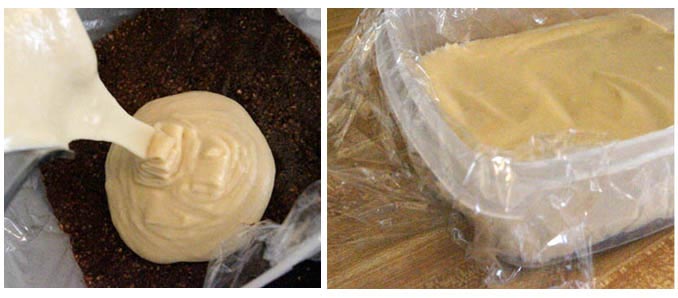
Next, using a spoon, gently pour 3-4 lines across the cheesecake bars:
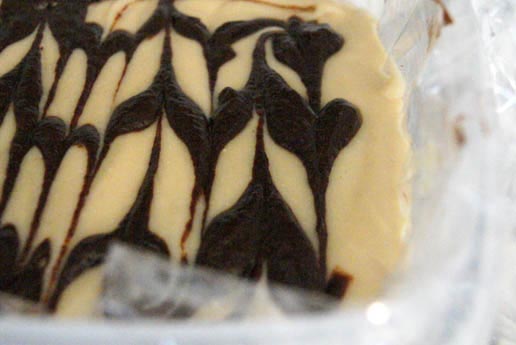
It’s okay if it’s messy, because you’ll be dragging a knife through those lines next! With a light touch, drag a knife back and forth perpendicularly to the lines you made– creating a marbled look like this:


 Be sure to store these in the freezer– they will melt quickly at room temperature!


